Setting up your first game server
Get your game server running in minutes. Follow these simple steps.Step 1: Choose Your Game
Go to berrybyte.net and click Create a Server. Pick your game from the list.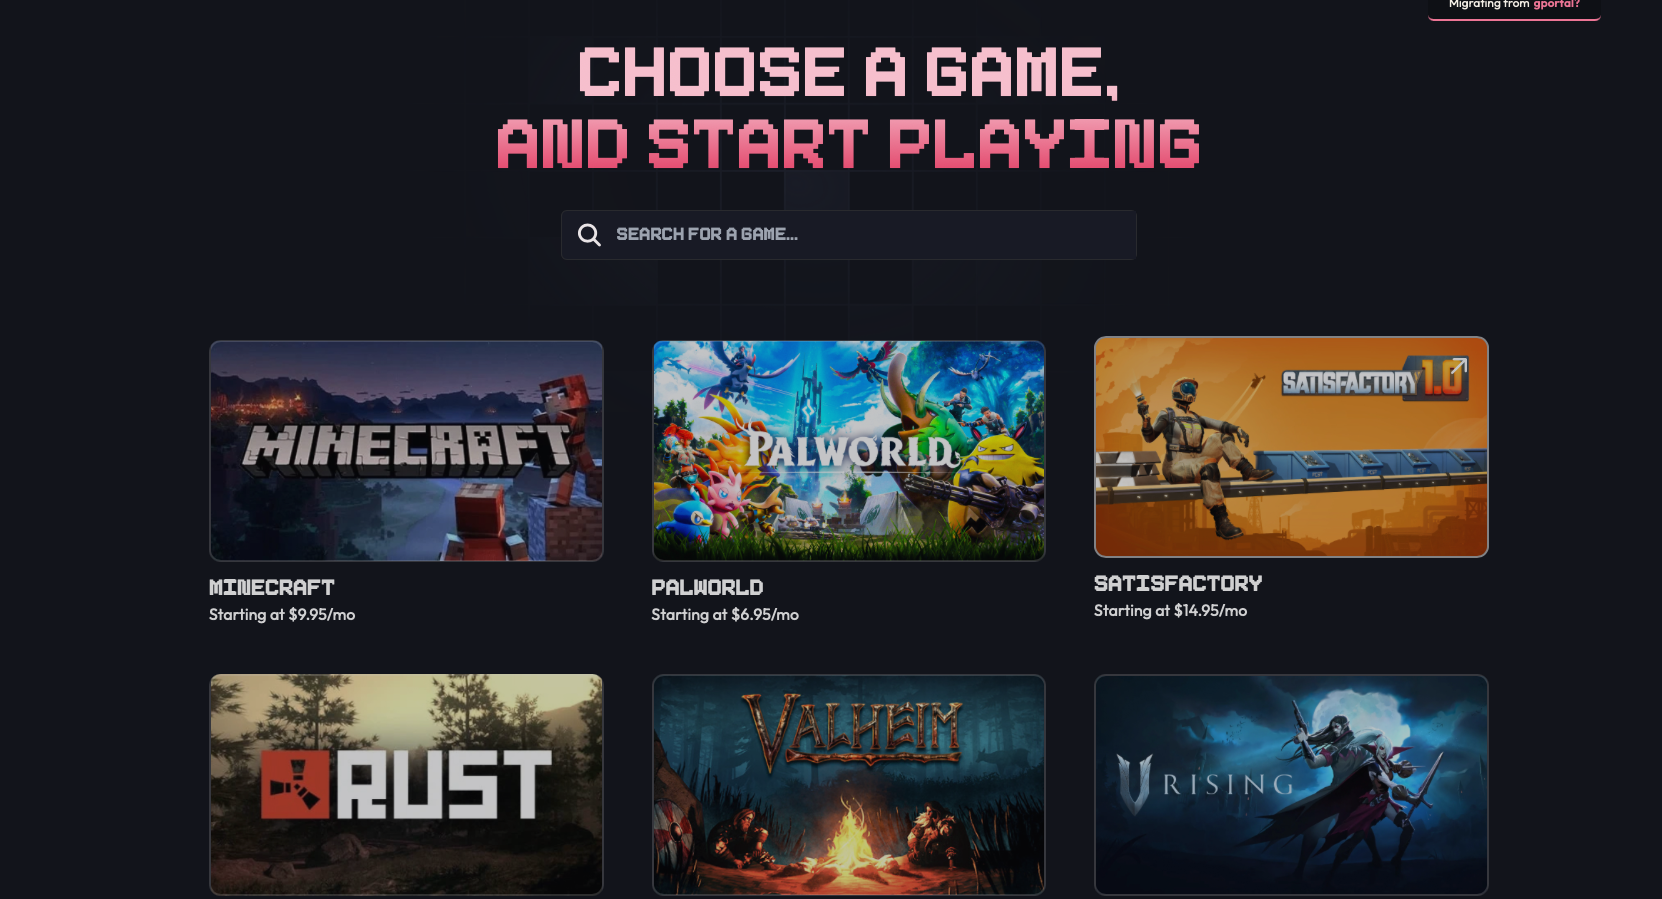
Step 2: Configure Your Server
Pick your settings: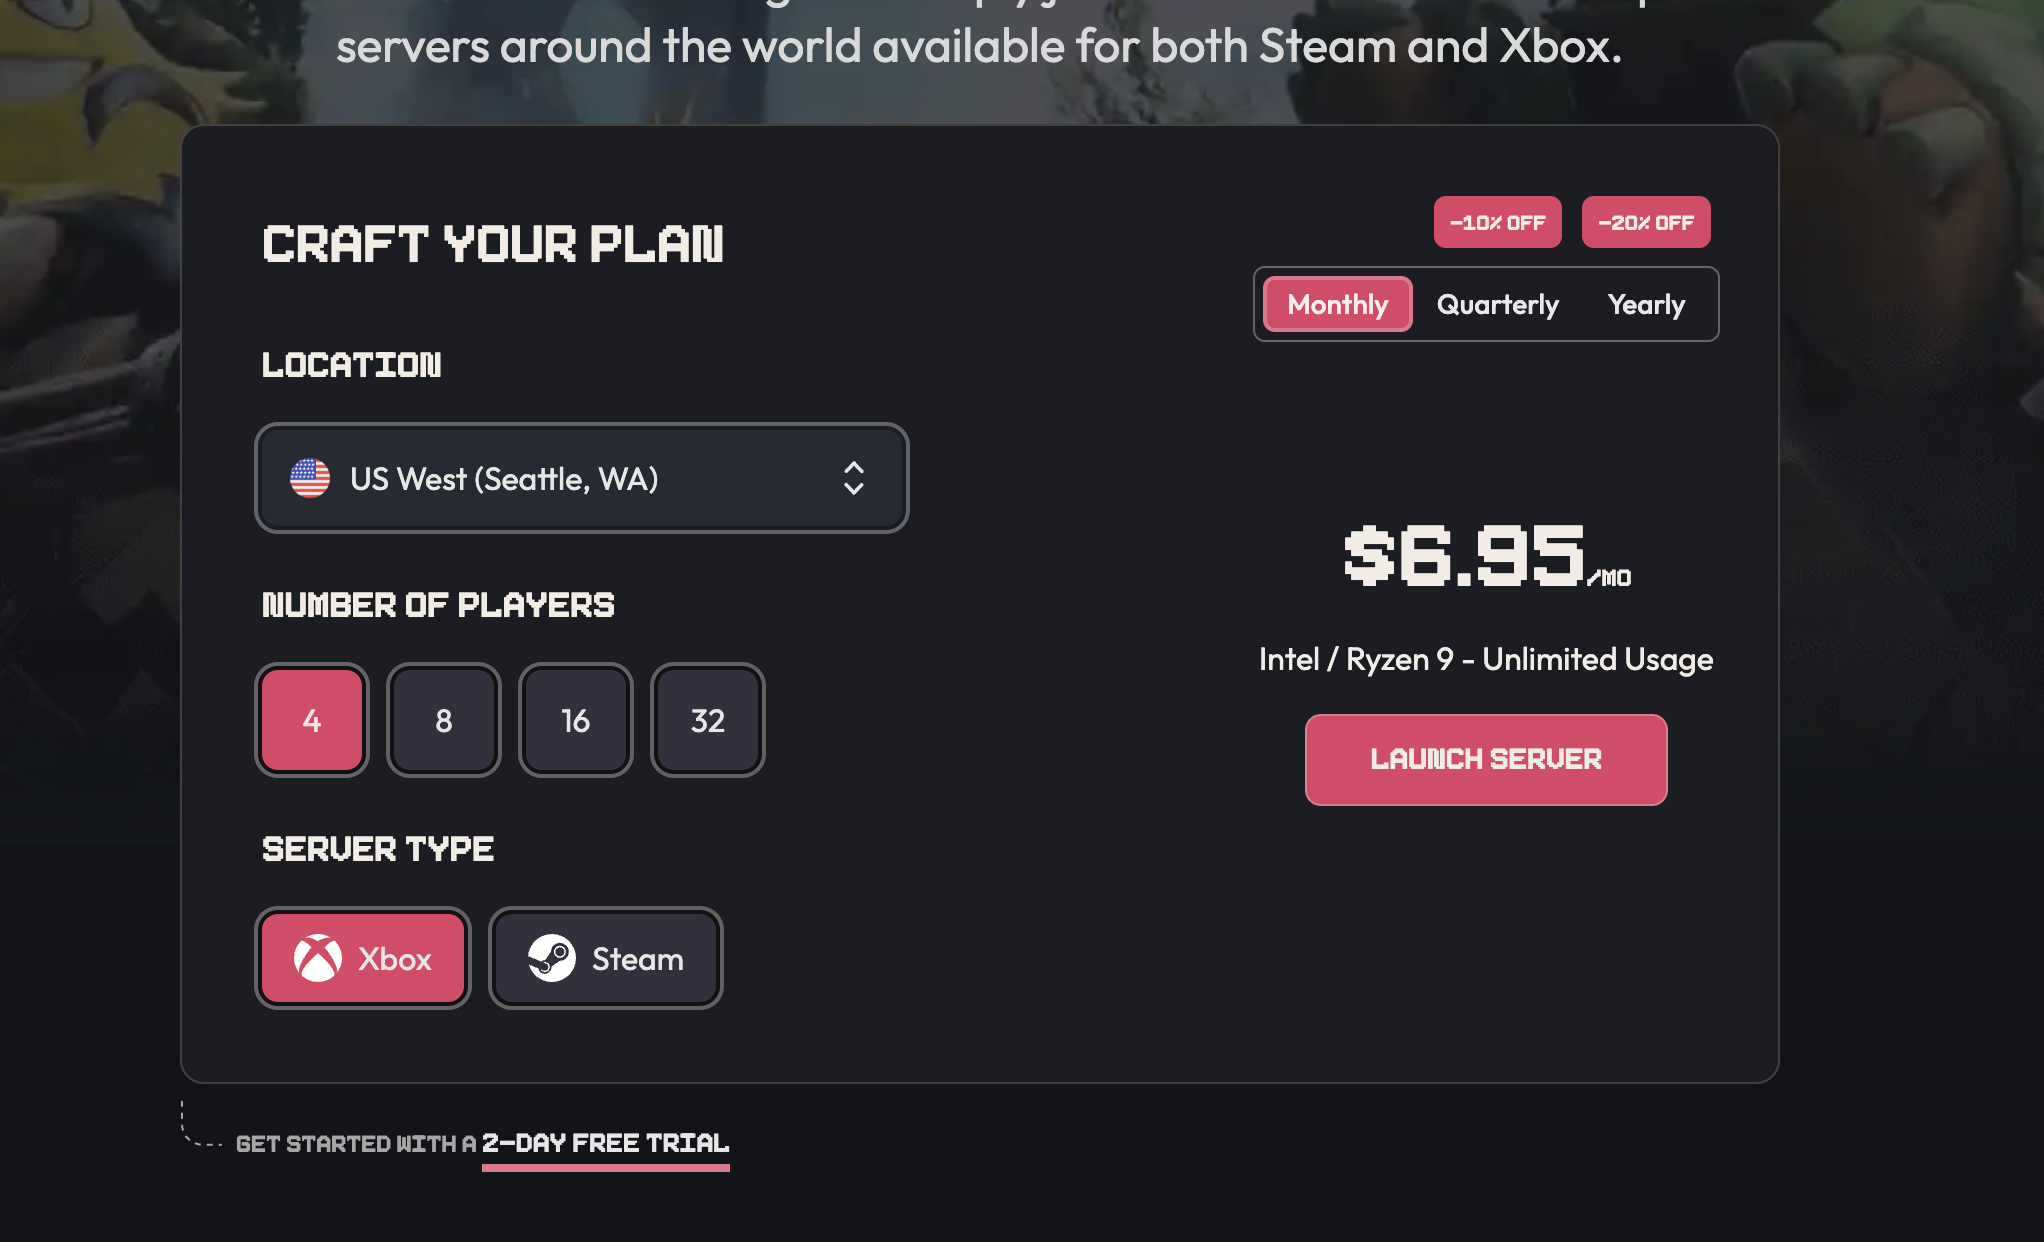
- Location: Choose the region closest to you
- Player Slots: How many players can join
- RAM: More RAM = generally better performance
Step 3: Access Your Game Panel
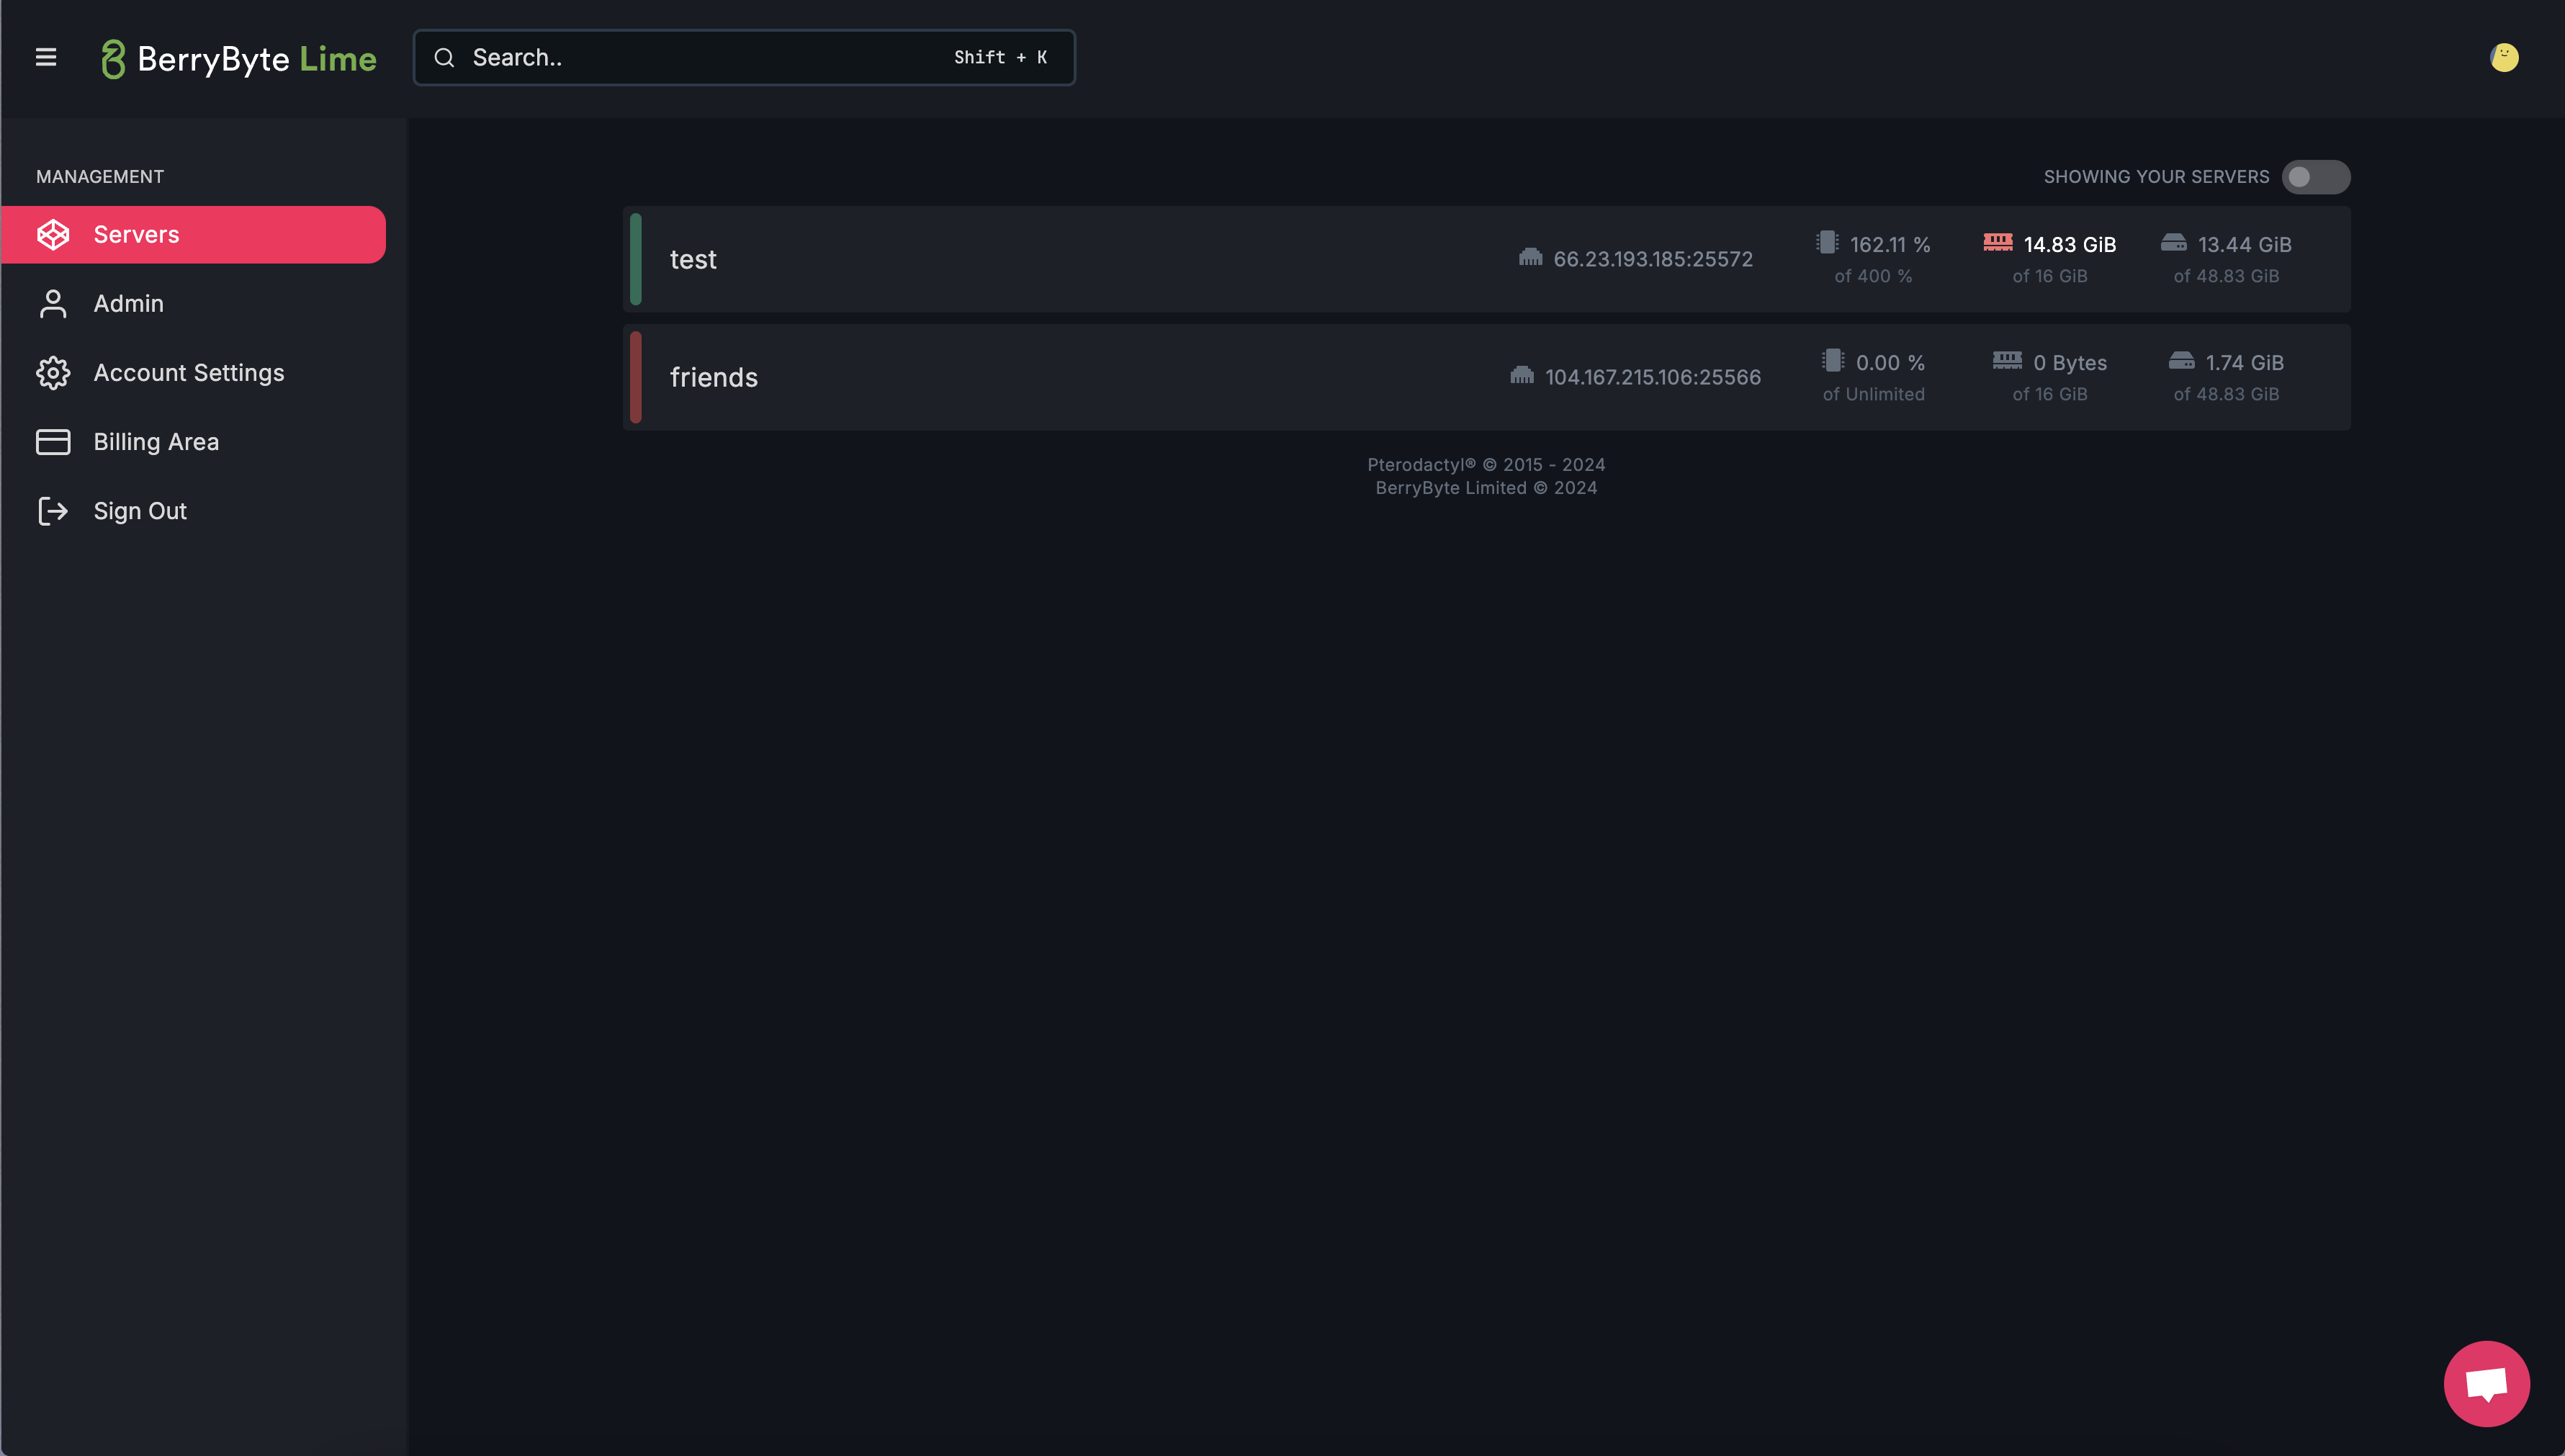
- Start, stop, and restart your server
- Manage files and settings
- View server logs
- Create backups
Step 4: Start and Connect
- In your panel, click Start to turn on your server
- Wait 1-3 minutes for it to start up
- Copy your server IP address from the panel
- In your game, use “Direct Connect” or “Add Server” and paste the IP
Next Steps
Your server is live! You can:- Adjust settings in your panel
- Install mods or plugins
- Set up backups
- Configure player limits and passwords